
Installing or replacing a heating system looks straightforward on a quote sheet: remove the old unit, set the new one, connect power and gas, test, done. The real work lives under the surface, in the paperwork and code checks that keep your house safe and your insurer happy. Permits and codes aren’t just bureaucracy, they embed hard lessons from fires, carbon monoxide incidents, frozen pipes, and flooded basements. If you understand how they fit together, you plan better, avoid costly delays, and end up with equipment that runs as designed.
What a permit actually does
A mechanical permit is an agreement with your local building department. You or your contractor declare the scope of work, the equipment, and the location. The authority issues a permit, and an inspector confirms that your installation meets the applicable codes. That approval becomes part of your property record, proof that the work was done correctly.
For a heating system installation, the permit usually covers the equipment, venting, gas piping, combustion air, condensate disposal, electrical connections, controls, and in some cases ductwork alterations. If the job includes new gas piping, an electrical circuit, or structural changes, separate permits can apply. In many towns the mechanical permit is enough for a like‑for‑like swap of a furnace, but a full heating replacement that changes fuel type or increases load often triggers additional reviews.
Homeowners sometimes ask whether a permit is truly necessary if they hire a licensed contractor. The simple answer: almost always. Most jurisdictions require a permit for heating unit installation even when no ductwork changes occur. Insurers and home buyers look for that record. Skipping the permit can cause two problems later. First, warranty claims may be denied if the manufacturer discovers an unpermitted or noncompliant setup. Second, unpermitted work can derail a home sale or require retroactive inspections and corrections at higher cost.
The code family you are dealing with
Codes vary by state and city, but they draw from the same model standards. If you know the core references, you can decode most local requirements.
- International Residential Code (IRC) and International Mechanical Code (IMC). These set the baseline for one‑ and two‑family dwellings and mechanical systems in general. Many municipalities adopt one or both, with amendments. National Fuel Gas Code, NFPA 54. Governs gas piping, combustion air, venting for gas appliances, pressure testing, and appliance connections. National Electrical Code, NFPA 70. Covers branch circuits, disconnects, grounding, bonding, and control wiring for HVAC equipment. International Fuel Gas Code (IFGC). In some regions, this is used instead of NFPA 54 for gas. Manufacturer’s installation instructions. These carry force of code. Inspectors will cite them directly. If the code and the manual differ, you usually follow the stricter requirement.
Municipal amendments add local priorities. Coastal areas may add corrosion protection rules. Cold climates often amend combustion air and freeze protection details. High altitude zones change venting guidance. If you live at 6,000 feet and install a sealed‑combustion furnace, the derate and vent length limits are different than at sea level.
When you need a permit, and when you might not
Expect to pull a permit for these scenarios:
- Heating system installation involving new or resized gas piping, new venting, added electrical circuits, or any structural alterations for equipment or flues.
In some areas, if you replace an existing furnace or boiler with the same fuel and similar capacity without changing the vent or gas pipe diameter, the department allows a “like‑for‑like” express permit. You still file, but the review is lighter and the fee lower. Space heaters, wall furnaces, unit heaters in garages, hydronic boilers with backflow preventers, and oil appliances almost always require full permits because of additional fire and fuel storage considerations.
Portable electric heaters and minor control work like replacing a thermostat in kind often do not require a permit, but confirm locally. More than once I have seen a homeowner replace a mercury thermostat with a modern Wi‑Fi model, then discover they needed a new common wire and overfused control circuit. That small project becomes an electrical permit if a new circuit or transformer gets added.
The sequence that keeps jobs moving
The best installs follow a quiet rhythm that avoids rework. On a typical furnace replacement:
First, submit the mechanical permit application with equipment submittals. Include model numbers, BTU input and output, efficiency rating, vent type, and layout sketches. If gas piping changes are planned, add a gas schematic showing pipe sizes and lengths, and a total connected load calculation. If electrical work is more than a simple reconnect, add an electrical permit with a one‑line diagram or circuit description.
Second, wait for approval or conditional approval. In many cities, mechanical permits for residential heating issue in 1 to 3 business days. Dense urban jurisdictions can take a week or more. Some require a plan review for new boilers, rooftop units, or when penetrations cross fire‑rated assemblies. Plan review is where questions about clearances, fireblocking, and combustion air usually surface.
Third, schedule any required rough inspections if you are running new venting through concealed spaces or installing new gas lines. You do not want to close a ceiling before an inspector sees the vent supports and firestopping. Pressure test gas lines to the local standard. Many jurisdictions require a 10 psi test with a sensitive gauge for 15 minutes or longer, with no drop. Others require test pressures proportional to the maximum operating pressure, particularly for CSST.
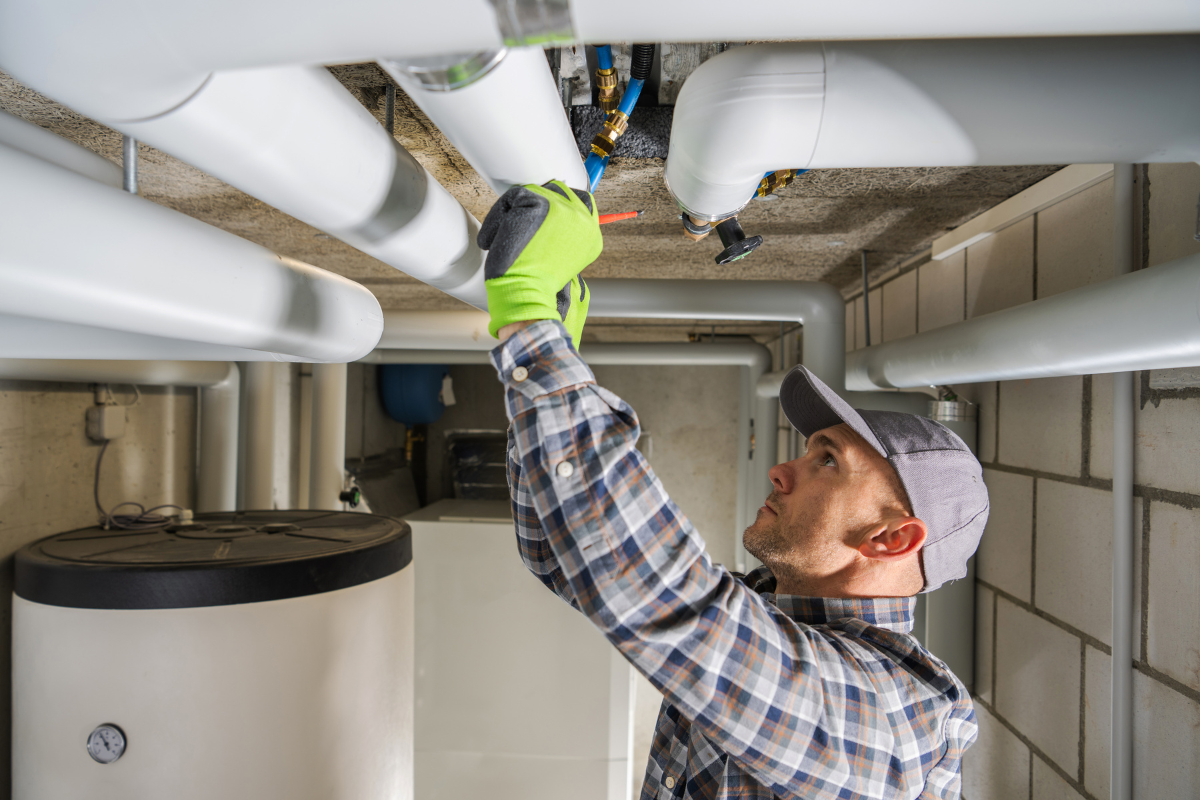
Fourth, complete the heating unit installation. This is the part everyone can see: set and level the furnace or boiler, align supply and return, adapt duct or hydronic connections, install vent and intake with proper slope, run condensate with an air gap, connect gas with a sediment trap, bond CSST where applicable, wire the high and low voltage, program the control board, and verify static pressure and combustion. A final inspection closes the permit.
Gas appliances and the rules that matter most
Most failures I see cluster around gas piping, venting, and combustion air. The code reads like a phone book, but a practical set of checkpoints catches the majority of problems.
Clearances from combustibles. Every appliance has required service clearances and fire clearances. A common mistake is squeezing a furnace into a closet so tight that the access panel can’t be removed. Inspectors will measure. Plan for filters to be replaced without contortion.
Gas pipe sizing. The National Fuel Gas Code has tables that size pipe based on length, load, and pressure. If you add a 100,000 BTU furnace to a branch already serving a water heater and range, the old 1/2‑inch run likely underserves at 40 feet. Undersized piping starves the furnace at high fire, leading to nuisance lockouts and poor combustion. Your permit application should show your calc. You can use a longest‑run method for a quick check, or a branch method if the layout suits. Where low pressure 0.5 psi systems feed multiple appliances, upsizing to 3/4 inch for a long trunk is common. If you install CSST, bond it per the manufacturer’s instruction and your local amendment. Some cities require direct bonding with a dedicated clamp near the manifold, not just relying on equipment bonding.
Drip legs and shutoffs. The code calls for a sediment trap at the appliance, downstream of the shutoff, upstream of the appliance connection. People skip it because it is one more fitting, but it catches debris and condensate. Inspectors look for it, and manufacturers require it.
Combustion air. Furnaces and boilers need air to burn cleanly. Two different strategies exist. One, sealed combustion units use PVC or polypropylene to bring combustion air from outside. Most inspectors like these because they isolate the appliance from indoor pressure fluctuations. Two, atmospheric appliances draw from the room or from ducted combustion air openings. If you rely on indoor air, the space must either be large enough or must be connected to other spaces or the outdoors with grilles sized by code. I have seen older homes tighten up with new windows, then a perfectly good water heater backdrafts because the home is too tight. When in doubt, pick sealed combustion.
Venting and termination. For condensing appliances, vent slope back to the unit is essential so condensate drains to the trap. Maintain separation between intake and exhaust to avoid recirculation, and keep terminations clear of grade, snow line, and openings. Measurements vary, but 12 inches above grade is a common minimum, more in snow country. Avoid driving vent terminations into soffits or alcoves that trap moisture. For non‑condensing units with a metal flue, draft and height rules apply. Shared vents with water heaters require careful sizing. The water heater often becomes an orphaned appliance when you replace a naturally drafted furnace with a high‑efficiency unit that vents outdoors. That leaves the water heater on an oversized chimney that no longer heats up properly. You may need a chimney liner to keep the water heater drafting safely.
Combustion testing. Not every inspector performs a combustion analysis, but a good installer will. Carbon monoxide at the flue should fall within the manufacturer’s published range, often in the tens to low hundreds of ppm air‑free at high fire, with steady oxygen readings and appropriate stack temperatures. In the field, numbers that bounce suggest restricted combustion air or poor gas pressure.
Electrical and controls that pass muster
Even gas furnaces live or die by their wiring. The codes address a few key items that often cause red tags.
Dedicated circuit and disconnect. Many jurisdictions want a dedicated 15‑ or 20‑amp circuit for a furnace with a service disconnect within sight. Some allow the breaker as the disconnect, others want a local switch. Nameplate amperage dictates the minimum conductor and overcurrent size, but the manufacturer’s instructions often require a specific maximum. Do not oversize fuses to “stop nuisance trips.” That defeats motor protection.
Grounding and bonding. Proper equipment grounding is nonnegotiable. Bond the cabinet, ensure a continuous grounding path, and land the grounding conductor in the correct lug. When you add a condensate pump or humidifier, bond those as needed, and avoid bootlegging neutrals for control transformers.
Low voltage control wiring. Route thermostat wires cleanly, avoid sharing holes with line voltage without a divider, and protect cable against sharp edges. Several nuisance issues come from induced voltage between high and low voltage conductors, especially with ECM motors and communicating controls. If you use a common wire adapter, follow the wiring diagram precisely. Inspectors often check that control wiring is not in the same conduit as power conductors unless the insulation rating permits it.
Condensate management. For condensing furnaces and high‑efficiency boilers, you need a trapped drain with a cleanout. Discharge to an approved location with an air gap, not into a vent pipe. Many locales require neutralization for acidic condensate before it enters the household drain, especially with cast iron piping. Float switches on secondary drain pans or inline condensate safety switches are cheap insurance, and some codes make them mandatory in attics or other sensitive areas.
Ductwork and airflow, the quiet compliance issue
Ducts rarely prompt a dramatic red tag, but they determine comfort, efficiency, and noise. Modern furnaces and heat pumps expect static pressure below 0.5 inch of water column across the coil and heat exchanger in many configurations. When you enlarge capacity during heating replacement without adjusting ducts, the blower runs at high tap to keep up, noise rises, and efficiency falls.
Codes touch duct sealing, insulation, support, and materials. Many states require mastic sealing of joints in unconditioned spaces, not just tape. Flexible duct has maximum length and bend radius guidelines in manufacturer instructions that, combined with code, keep friction losses reasonable. Return air cannot be pulled from a garage or furnace room with atmospheric combustion. Ducts through garages need gauge and sealing upgrades to resist fume transfer. When in doubt, add a return in the space served and confirm with a static pressure measurement after startup.
A good permit set for a major heating system installation includes a Manual J load calculation, Manual S equipment selection, and Manual D duct design. Not every building department enforces these for replacements, but presenting them reduces pushback when you propose a smaller unit than the old 150,000 BTU beast. I have replaced many oversized furnaces with 60,000 to 80,000 BTU units after a real load calc, and the house finally heats evenly, cycles less, and the utility bill drops.
Special cases: boilers, hydronics, and radiant
Hydronic systems add a few layers of code compliance that are easy to miss.
Backflow prevention. Most jurisdictions require a double check backflow preventer or a pressure‑reducing fill valve with integral backflow when tying a boiler to domestic water. Inspectors look for a proper air gap or device to prevent boiler water from contaminating potable lines.
Expansion and relief. The expansion tank must be sized and placed on the suction side of the circulator. A 30 psi relief valve with a discharge pipe to a safe location is mandatory. Do not reduce the discharge pipe diameter or cap it.
Low water cutoff. Required in many places for boilers above specific input or on systems with hidden piping where a leak could go unnoticed. Even when not required, it is wise on multi‑story homes.
Combustion air and venting mirror the furnace guidance, but boilers often vent through liners in masonry chimneys. If you convert from oil to gas, a liner is almost always necessary because the cooler flue gases from gas appliances do not keep the masonry warm, which leads to condensation and spalling.
Radiant floors and snow melt systems require mixing controls and temperature limits to protect floor finishes and avoid scalding risk. Some jurisdictions require a listed heat exchanger when non‑potable fluids like glycol are used.
Oil, propane, and storage considerations
Oil‑fired appliances bring the fire code into play. Tanks, whether indoor or outdoor, have setback, anchoring, and venting rules. Vent and fill piping must be sized and routed per NFPA 31, with a remote fill often required outdoors. Many cities prohibit new underground oil tanks because of leak risks. If you decommission an old UST during heating replacement, expect soil testing and a closure report.
For propane, set tanks at required distances from ignition sources and property lines. Regulators must be accessible, and gas piping from an outdoor tank usually sees higher inlet pressure with a secondary regulator at the appliance. Bond and ground per the propane supplier’s standards and local code. Permits for propane sometimes involve both the fire department and building department, so start early.
Heat pumps and electric heat, not just plug and play
Air‑source heat pumps and electric furnaces simplify venting and combustion but bring more electrical scrutiny. A heat pump with auxiliary electric heat can draw 40 to 100 amps. Panel capacity, conductor size, and breaker selection need careful attention. Outdoor unit clearances for airflow and snow are critical. Some cities require pad height above design snowfall and wind baffles to prevent short cycling. Defrost condensate needs a path that does not turn a sidewalk into an ice rink.
In cold climates, building departments now expect a load calc showing that the selected heat pump covers the heating design or that you have sized auxiliary heat appropriately. If you are replacing gas heat with a heat pump, be ready to show the feeder capacity and any panel upgrades. Utilities sometimes offer rebates but require inspection documents, commissioning data, and photos of the nameplate.
Existing houses with surprises
Older homes hide conditions that collide with modern code. Here are the patterns that show up in the field.
- Asbestos. Transite flue liners, tape on duct seams, or boiler insulation can contain asbestos. Disturbing it without abatement is illegal in most jurisdictions. If you see white braided wrap or gray rigid panels, stop and test. Permits may be suspended until an abatement certificate is provided. Unlined chimneys. If a water heater remains on a masonry chimney after a furnace swap to high efficiency, a liner is usually required to keep draft and avoid condensation damage. Shared returns or panned joists. Older systems that use building cavities as return ducts may not meet current code for fire blocking and smoke transfer. Expect to add lined returns or seal and line cavities. Undersized returns. Many original systems underserve return air, which forces blowers to work harder and increases noise. Replacements that aim for higher efficiency benefit from adding return grilles rather than pushing the blower harder.
Working with inspectors, not against them
Most inspectors want you to succeed. They balance safety, code intent, and practicality. If you present clear documentation and show that you respect the process, inspections go faster.
A practical approach looks like this: have the permit, approved submittals, and manuals on site in a folder or tablet. Label gas lines with appliance loads if you ran new piping. Use a digital manometer to show gas pressure under load. Keep a combustion analyzer reading if you performed one. Leave access panels off for inspection. Mark the vent and intake with labels indicating combustion air and flue. If you made a design judgment call, such as vent routing through a challenging joist bay, be ready to explain how you met the equivalent requirements.
Failed inspections happen. The best response is quick and specific: identify the exact code section cited, correct the issue, and reschedule. Arguing on the curb rarely helps, but asking for clarification in writing prevents miscommunication. If you face a genuine gray area, a short email with a sketch and the relevant code section often gains a pre‑approval that everyone stands behind.
Costs, fees, and the real economics
Permit fees vary widely, from under 100 dollars for an express mechanical permit to several hundred for projects with gas and electrical components. Plan review fees add to that. Abatement or chimney lining, if needed, can dwarf the permit. From the contractor side, time spent on submittals, inspections, and any corrections is built into the quote whether you see a line item or not.
Studies from utility programs and building departments suggest that compliant installations reduce callbacks and fuel use by meaningful margins. A furnace running at proper airflow and gas pressure can save 5 to 15 percent compared to one installed poorly. When a heating replacement includes duct sealing and a real load match, I have seen 20 percent lower heating bills without any exotic technology.
Timing and seasonality
If you try to pull a permit the first cold week of November, you are competing with everyone else. Delays compound. In most climates, the shoulder seasons are friendlier. If you must replace in peak season, ask the contractor about temporary heat options and how they handle partial approvals. Some jurisdictions allow you to run the unit under a conditional approval pending final inspection so you are not without heat for days.
Homeowner versus contractor: who pulls the permit
Technically, the property owner can pull their own mechanical permit in many cities. If you are doing the work yourself, that is required. If you hire a contractor, insist they pull it. The license holder becomes responsible for the work in the eyes of the building department. If a contractor asks you to pull the permit “to save time,” question why. There are exceptions. In some towns, homeowner permits are cheaper or faster, but the liability, warranty, and inspection issues usually outweigh the savings.
Practical documentation to keep
Once the job wraps and you pass final inspection, keep a packet with the following: the permit and inspection record, equipment manuals, model and serial numbers, combustion analysis printout or photos, gas pipe sizing calc, and any photos of concealed work before it was covered. If you sell the home or file a warranty claim, this packet ends arguments.
When codes evolve faster than products
High‑efficiency equipment, refrigerants, and electrification incentives have pushed codes to evolve. You will see adoption of heat pump‑friendly electrical rules, stricter ventilation expectations in tight homes, and more attention to condensate management and neutralization. For example, jurisdictions that never asked about condensate pH five years ago now require neutralizers on condensing boilers. R410A is giving way to A2L mildly flammable refrigerants in many new systems, and that brings clearance and detector requirements that are still filtering through code cycles. If your heating system installation involves refrigerants classified as A2L, expect an extra layer of manufacturer and code coordination.
The lag between a new technology and its full incorporation into the adopted code can create gray zones. When in doubt, the manufacturer’s instructions and a clear conversation with the building department win the day. Present the hazards, the mitigations, and the equivalency to the code intent.
Bringing it together on a real job
A two‑story, 2,400‑square‑foot house built in the 1980s needs a heating replacement. The old 120,000 BTU atmospheric furnace and 3‑ton AC are noisy and short cycle. A Manual J shows a 54,000 BTU heat loss. The homeowner selects a 60,000 BTU, 96 percent AFUE, sealed combustion furnace with a variable‑speed blower and a 3‑ton heat pump for hybrid heat.
The contractor submits a mechanical permit with the equipment submittals and a simple sketch of the vent run and terminations on the side yard, 18 inches above grade to clear typical snow. The gas pipe calc shows the existing 3/4‑inch trunk is sufficient after removing the old oversized furnace and keeping the water heater and range. The electrical permit adds a 30‑amp circuit for the outdoor unit and confirms panel capacity. Within three days, permits are issued.
On day one, the crew sets the new furnace on a raised platform to clear a known floor drain backup issue, installs a secondary drain pan with a float switch, and runs the vent and intake with 1/4 inch per foot slope back to the furnace. They replace a sagging return drop with a larger one to reduce static pressure and seal joints with mastic. The gas line receives a sediment trap and a new shutoff, and the CSST manifold is bonded. Combustion air is brought in through the intake, isolating the furnace from the tight mechanical room.
On day two, the electrician lands the disconnect at the outdoor unit, pulls the new circuit, and sets a service switch at the furnace. Low voltage is routed cleanly in flexible conduit, away from the line voltage. The condensate drain gets a neutralizer cartridge because the home uses cast iron for the initial run. The crew performs a combustion analysis and static pressure check, documents gas pressure under load, and leaves the panels off.
The inspector checks the terminations, the bonding, the neutralizer, and the disconnects, flips through the manuals to verify clearances, and approves the job. The final paperwork goes in a folder the homeowner keeps with the house records. Six months later, the house sells. The buyer’s inspector sees the permits and neat work, and the deal skips the usual HVAC drama.
A short checklist you can use
- Verify which permits apply: mechanical, gas, electrical, fire. Confirm whether plan review is needed. Gather manufacturer instructions and include model data, venting tables, and clearances with the permit. Prepare gas pipe sizing and total connected load; identify any orphaned appliances and chimney liner needs. Confirm electrical capacity, required disconnects, and bonding; plan for condensate disposal and neutralization. Schedule inspections at logical points: rough for concealed venting or gas, final with panels off and test data ready.
Permits and codes shape a heating system installation from the first sketch to the final test. They are not perfect. They evolve and sometimes lag. But they do something valuable: they compress decades of field failures and engineering into a set of boundaries that keep families safe https://jsbin.com/dedatajezi and systems efficient. Respect those boundaries, and your heating replacement becomes simpler, not harder.
Mastertech Heating & Cooling Corp
Address: 139-27 Queens Blvd, Jamaica, NY 11435
Phone: (516) 203-7489
Website: https://mastertechserviceny.com/